DIY outdoor wooden table
Skill Level: Intermediate | Estimated Time: 3 hours
The grass has been cut, the weeds pulled and the patio’s been swept: It’s time to reward yourself with a beer – but wait! Where's the lawn table?
Looks like you'll be eating your dinner off your lap tonight — again. But tomorrow, it can be a different story. All you need is a few hours, some lumber, bolts, screws, and your trusty tools and accessories to make a table that you can use this weekend and weekends to come.
Simple, Cheap, Perfect
Table designs are legion, but you just need a simple one – bonus points for a design that uses materials you already have around the house or can pick up at any lumber shop. One of the most simple and classic designs uses a rectangular top supported by four straight legs. The legs are connected to a simple frame that also supports the top's boards. All of the wood parts can be made with standard untreated lumber for an inexpensive table that works for outdoor use.
Step by Step Instructions
Step 1. Cut Lumber
Cut six 2x6 boards to the desired length of the table, using a circular saw. In this procedure, we’ll make the table 36 inches long. Take care to ensure all of the boards are the same length. Layout the boards on a flat surface – best side down – with no spacing between them. Measure the width across all of the boards and cut two braces from 2x4 lumber to this measurement — minus 6 inches. For this table, the width of the tabletop is 33 inches, so the braces should be 27 inches long.
- (6) 2x6 lumber - 36" long
- (2) 2x4 lumber - 34" long
- (1) 2x4 lumber - 28" long
- (4) 2x4 lumber - 27 ½" long
- (4) 2x4 lumber - 27" long
- (2) 2x4 lumber - 24" long

Step 2. Make the Tabletop
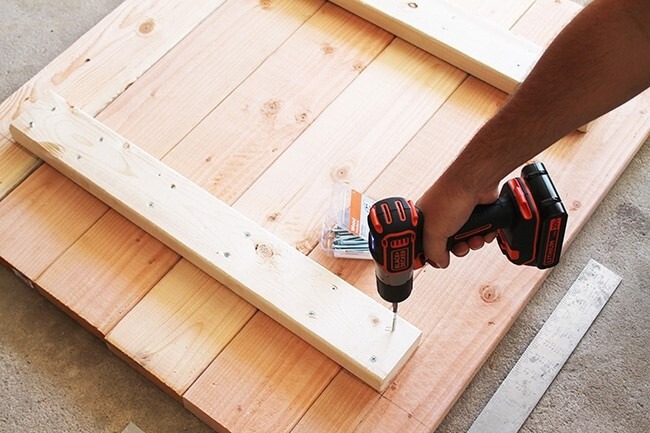
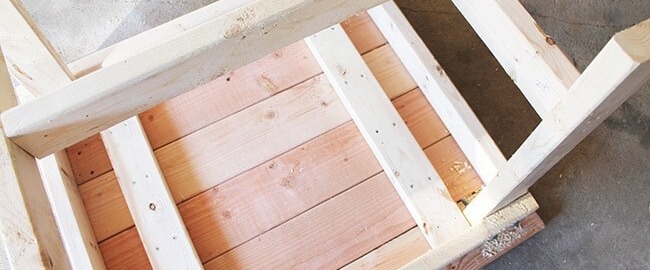
Position the braces 6 inches from the ends of the tabletop and 3 inches from the sides, square them with a carpenter's square and drive two screws through the braces and into each of the top's boards, using a drill/driver. If the tabletop is more than 3 feet long, cut and install a third brace at the center of the tabletop.
A drill/driver with automatic depth control senses when the screws are fully driven so you don't strip the heads or sink them too deeply.
Step 3. Construct the Frame
The tabletop rests on a rectangular 2x4 frame that is large enough to enclose both of the braces and leave room for the legs. Measure the distance between the outside edges of the braces and cut two 2x4's that are 10 inches longer than this measurement. Cut two more 2x4's that are the same lengths as the tabletop braces.
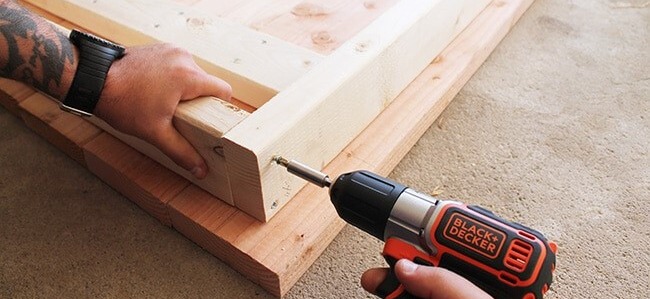
Assemble the frame by placing the two longer pieces over the ends of the shorter pieces, with all of the pieces on-edge and the outside faces of the short boards flush with the ends of the long pieces. Drive two screws through the long boards and into the short boards at each corner.
Ideally, this frame fits tightly over the braces and requires a little effort to remove. Slip the frame over the braces so the edges of the frame are tight against the tabletop boards, and there's a 3 1/2-inch space between the braces and the short boards of the frame. Fasten the frame to the braces with two screws driven through the long frame boards and into each brace.
Step 4. Add the Legs
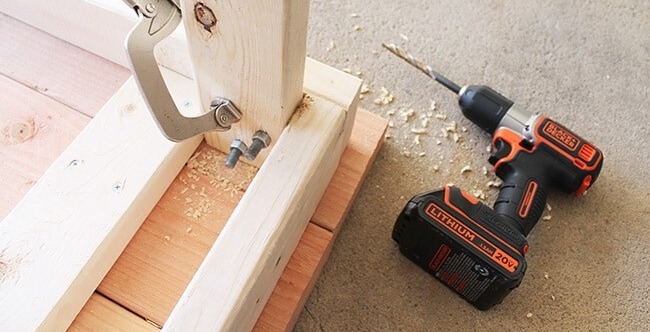
You can attach the legs to the frame in a variety of ways; in this design, they go inside the 2x4 frame and get bolted to the long side pieces. This makes it easy to remove the tabletop when you need to store the table for winter.
The typical height of a table is between 28 and 30 inches. Cut four 2x4 legs at 27 1/2 inches for a 29-inch-tall table, or cut them longer or shorter as desired.
Tip: As an option, you can build chunkier legs by cutting eight leg pieces and pairing them up to create 3x3 1/2-inch legs. Join each pair with wood glue and screws.
Place each leg into a space between a brace and the 2x4 frame so the leg's face is against the long frame board, and the leg's end is tight against the tabletop. Use the square to hold the leg perpendicular to the frame (straight up) and clamp the leg to the frame with a C-clamp. At each leg, drill two 3/8-inch holes through the long frame piece and leg. Position the holes diagonally from each other, about 1 inch from the inside and outside edges of the leg. Secure the leg to the frame with two 3/8x4-inch carriage bolts, tightening the bolts with a wrench. Use 5 1/2-inch-long bolts if you made doubled-up legs.
Step 5. Brace the Legs
Braces for the legs follow a classic farm table design and include a 2x4 cross-brace spanning between each leg pair. The cross-braces are joined at their centers by a single 2x4 brace, called a stretcher, running parallel to the table's length.
Cut each cross-brace to fit snugly between each leg pair. Position each cross-brace 6 inches up from the bottom ends (opposite the tabletop) of the legs so the faces of the legs and cross-brace are flush. Attach the brace to the legs by driving screws at 45-degree angles through the brace and into the legs; to make this easier and more accurate, drill a 1/8-inch pilot hole first.
Measure between the inside faces of the cross-braces and cut the 2x4 stretcher to fit. Install the stretcher — edge up — between the centers of the cross-braces, using angled screws.
Step 6. Finishing Up
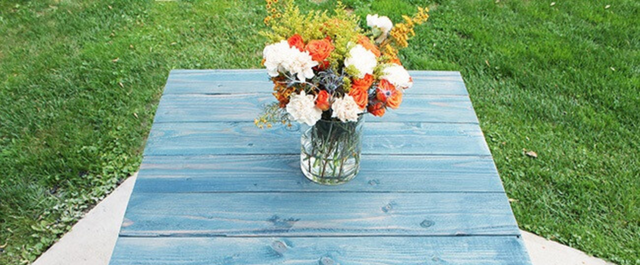
Your table needs some kind of finish to protect it. This can be as simple as a coat of clear waterproofing sealer, but if you’re serious about building a table that can last longer, you need a finish that blocks sunlight. Spar varnish is a good choice if you like the appearance of natural wood. If you want to flex your creative muscles, paint the table to match the garden decor. Remove the tabletop (just take out the leg bolts) before finishing to ensure you leave no wood exposed on the underside or inside the frame. If you paint or varnish, you'll have to follow the paint or varnish manufacturer’s instructions on when to use the table, but the wait will be worth it.


