DIY couch organizer

Skill Level: Beginner | Estimated Time: 3 hours + dry time
Keep your laptop, phone, and other devices safe and within reach with this innovative yet simple couch tech organizer.
The clean styling of the unit easily fits into any home's decor and looks just right on the arm of any couch.
Step by Step Instructions
Step 1. Cut the Plywood
Use the BLACK+DECKER 20V MAX* 5-1/2 in. Circular Saw to cut the 3/4" plywood to the following measurements:
- (1) piece, 10 x 16" for the outside of the couch arm
- (1) piece, 7 x 16" for the top of the couch arm (or measure and cut to fit your own couch arm)
- (1) piece, 4-3/4 x 16" for the inside of the couch arm
- (1) piece, 5 x 16" for the side of the pocket
- (1) piece, 1-3/4 x 16" for the bottom of the pocket (or measure and cut to fit your own tablet or laptop)

Step 2. Drill Countersink Holes
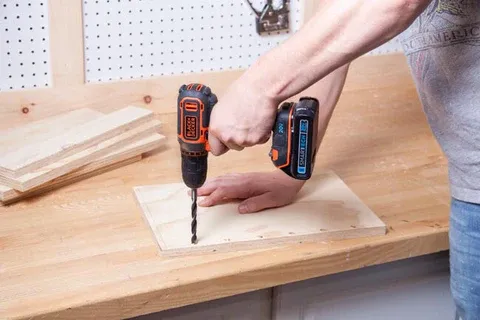
Measure across the 16" side of the 10 x 16" piece of plywood and make six even-spaced marks 3/8" from the 16" edge. Do the same with the 4-3/4 x 16" piece and the 5 x 16" piece. Use the BLACK+DECKER SMARTECH™ 20V MAX* Lithium Drill/Driver and a 3/8" brad-point bit to drill a 1/4" deep countersink hole at each mark.
Then, drill a pilot hole through the center of each countersink hole, using a 5/32" drill bit. The countersink holes will accept the furniture buttons to conceal the screw heads.
Depending on what type of screw you're using, pilot holes should be just slightly smaller than the screw.
The idea is to allow the hole to be big enough for the screw to pass through without splitting the wood, but at the same time, small enough so that the threads grip firmly.
Step 3. Assemble the Couch Arm Pieces
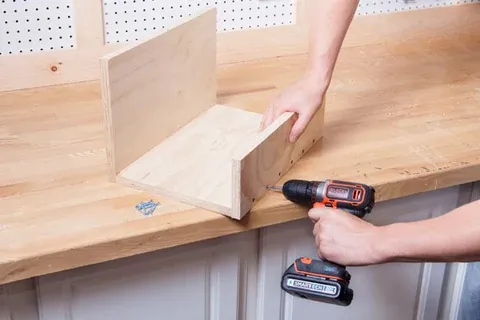
Apply wood glue to both edges of the 7 x 16" top piece. Screw the 10 x 16" piece flush with the top edge of the top piece, using the pilot holes and 1-1/4" wood screws. Screw the 4-3/4 x 16" piece to the opposite side of the top piece, flush with the top, sandwiching the top piece between the two vertical side pieces.
Step 4. Add the Pocket Pieces
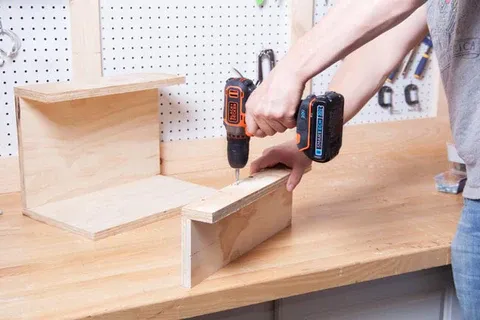
Apply glue to one 16" edge of the 1-3/4 x 16" pocket bottom piece. Fit it against the face of the 5" pocket side piece, flush with the bottom edge. Screw the two pieces together, using the countersunk holes in the side piece, to form an L-shaped part measuring 2-1/2 x 5".
Step 5. Complete the Assembly
Drill six holes, evenly spaced, 3/8" above the bottom edge of the 10 x 16" piece, using the 5/32" bit. You don't need to countersink these holes because they are on the inside of the assembly and won't be visible when the organizer is in place. Apply glue to the exposed 16" edge of the pocket bottom piece. Fit it against the outside face of the 10" piece, flush with the bottom, and fasten it with 1-1/4" screws.

Step 6. Sand + Add Buttons
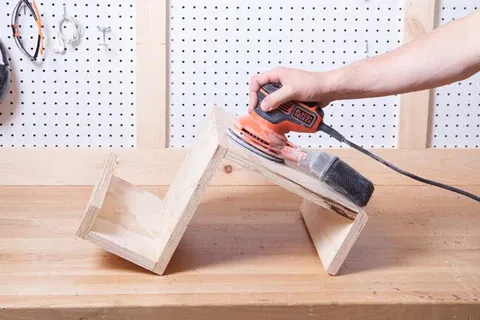
Sand everything smooth using the BLACK+DECKER 5 in. Random Orbit Sander and 100-grit sandpaper. Lightly round over all the corners and edges for a smooth feel. Apply glue to each 3/8" countersink hole. Use a hammer to tap one 3/8" hardwood furniture button into each hole. Let the glue dry as directed by the manufacturer.
Tip: Dress up the couch organizer by adding additional furniture buttons at regular intervals anywhere you like.
Step 7. Stain + Finish the Organizer
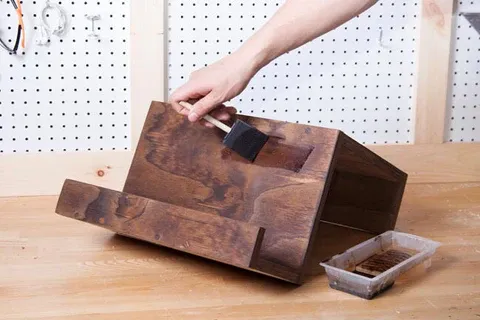
Apply a coat of Danish oil with a soft cloth, and let the oil cure as directed by the manufacturer. We chose a black walnut finish. Spray the organizer with a light coat of medium-gloss aerosol lacquer, and let dry, as directed by the manufacture. Sand the organizer by hand with 120-grit sandpaper. Apply another coat of lacquer to finish the job.
Step 8. Add Oil Based Stain (optional)
Tip: Oil-based stain adds richer color and more depth than water-based stain, but if drying time is an issue, you can opt for water-based stain. It requires only minutes to dry.


