DIY coat hanger
Skill Level: Beginner | Estimated Time: 2 hours
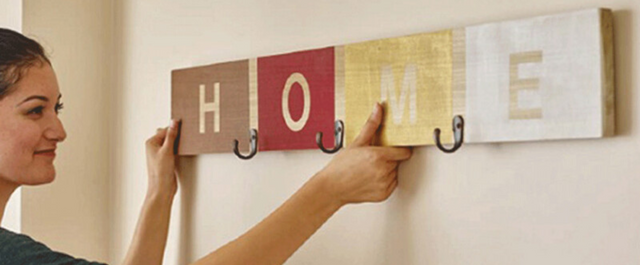
Build this cozy coat hook to organize the winter-wear clutter as the weather gets chilly.
Hang it by your front door for a convenient place to drop coats on your way in, and they’ll be there waiting for you to grab them your way out of the house. Get creative and choose colors that fit your space.
Step by Step Instructions
Step 1. Size + Sand
Have the board cut to size at your local home improvement store when you purchase it. Sand your board for a softer look. Even if you don’t have many rough edges, sanding truly adds a finished, professional look to any piece.
Step 2. Tape + Paint
Use 3 strips of tape to separate the board into 4 sections. Then, trace “HOME” letter stencils onto wood with a pencil. Now, paint your wood carefully and stay outside of the stencil – you can paint over the tape (carefully – avoid soaking tape with paint). Allow the paint to dry fully, rip off the tape to reveal clean lines.

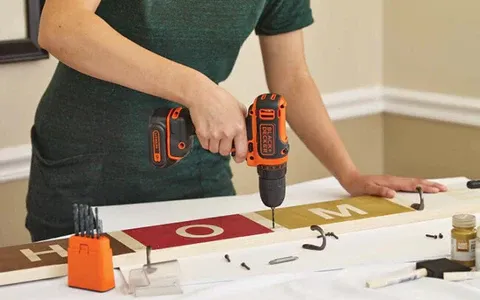
Step 3. Drill Pilot Holes
Do not start this step until your paint has dried completely! Drill 3 pilot holes for the hooks using your 12V MAX* Cordless Lithium Drill/Driver and a drill bit.
Step 4. Attach Hooks
Also using your 12V MAX* Cordless Lithium Drill/Driver, screw in and secure the 3 coat hooks to your sign.
Step 5. Hang Sign
Using your drill, attach picture mounting hardware to the back of the sign. Be careful to measure appropriately, or your sign may hang crooked! Find 2 studs in the wall. Drill a screw into each stud.
Attach wire to hardware, and hang sign evenly.


